THE ISSUE WITH RESISTORS
I should have done this ages ago. I really should have either made a few resistor boards or, gotten some. At that time, when I was designing LED circuits, it usually involves only white LEDs. But when it came to Tricorders which uses LED of different colours (read: different voltage and current), it really taxed my inventory, especially on the resistors. The theoretical values went out the window when I soldered them, resulting in the LEDs usually being too bright. It has come to a point where I would either need some variable resistors or, to make things more accurate, a resistor board.
THE RESISTOR BOARD DESIGN
In reality, it is a very simple concept where you connect some resistors in series to get the value you need. Before that, I had to purchase a lot of resistors and I would either combine them in series or in parallel to get the values that would work. This is usually not an issue but when it came to those tiny SMD ones, it can quickly become a real headache. Anyway, a quick search on the internet reveals the circuit of the Resistor Board. I can use 10-position rotary switches but it would make the board heavy and cumbersome. Another method is to get a 10-position slider switch (if it exists) which would make the board look cool. Both ideas are great but I’d end up spending more than I want as I’d still need to get those seventy plus resistors as well.

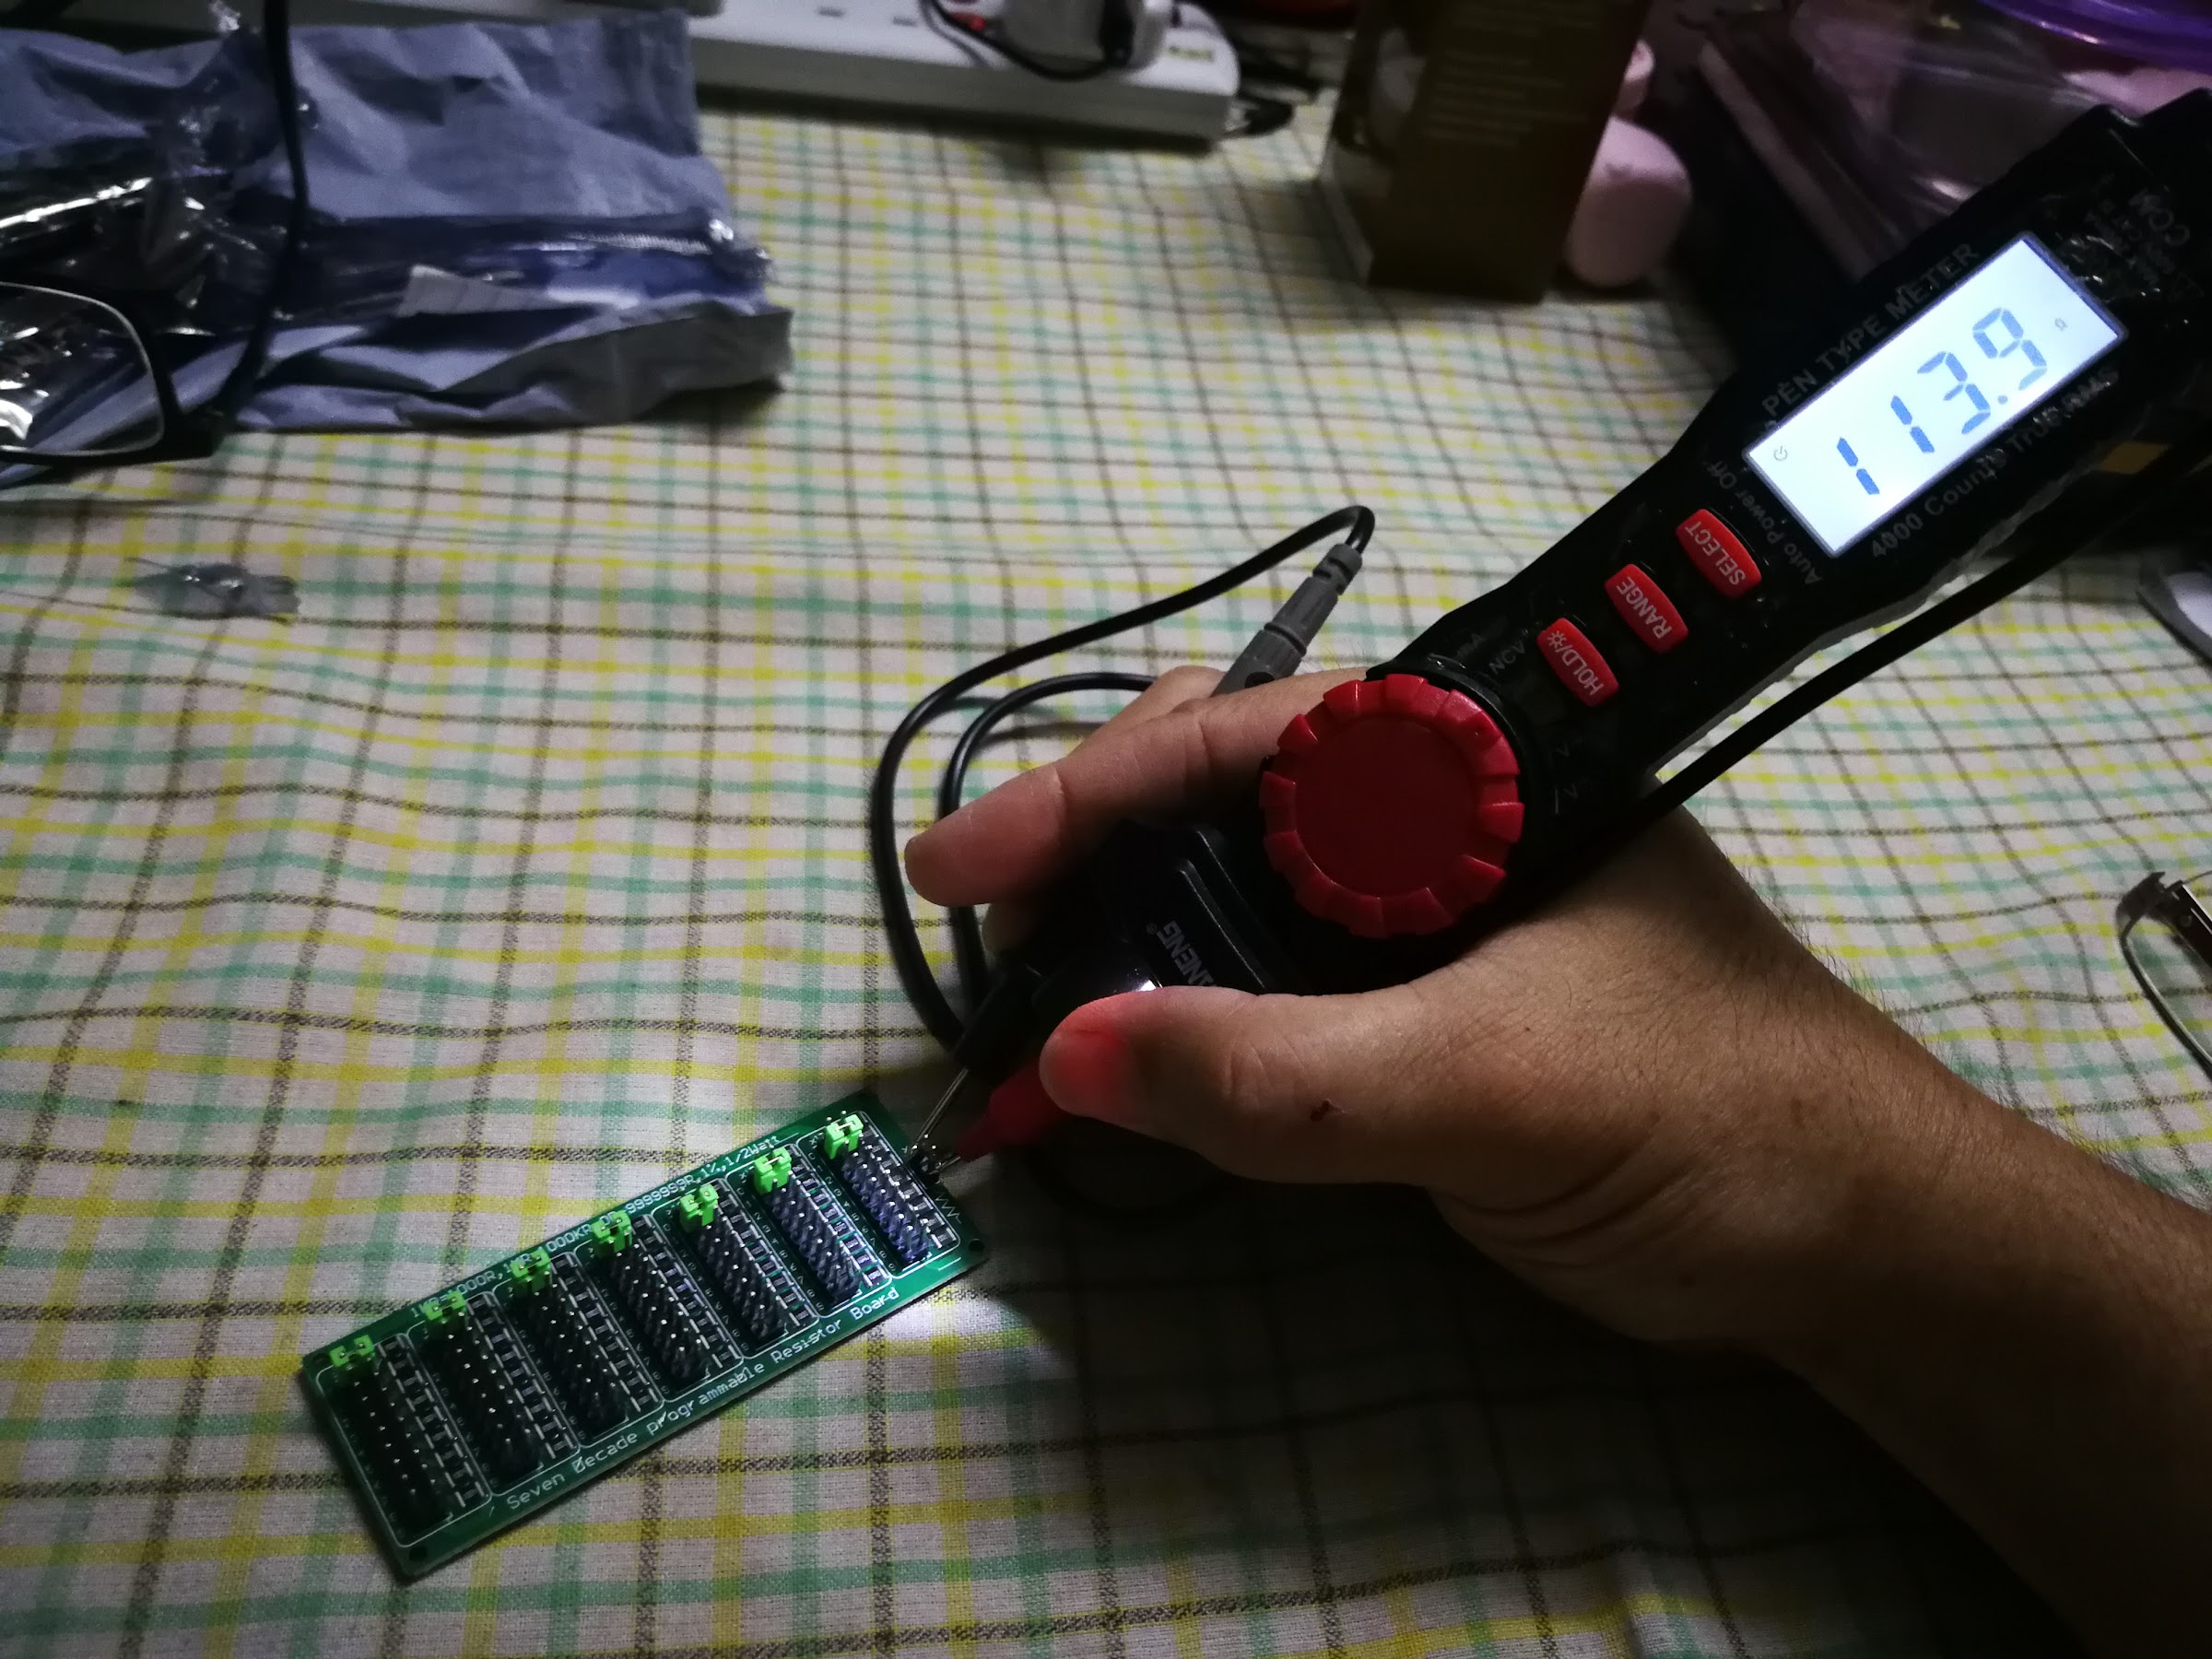
In this example, (S3 of 100R = 300R) + (S6 of 10R = 60R) + (S2 of 1R = 2R) = 362R
Image courtesy of the Arduino Forum
HOW TO USE THEM
Basically, you just re-position the jumpers to the relevant resistor values. And as for the values not being used, you just move their jumpers to ‘0’ to complete the circuit. And at the end of the board, there is a connector which you can either solder a pair of wires or, well, plug in a jumper-wire thingy. Just think of the whole board as one big resistor and the wires as the leads.
By using this board, I can change the values as I see fit until it is satisfactory. Then I can purchase the actual e24 SMD resistors. No more guess work, no more soldering & re-soldering and no more used resistors thrown into a box.

By moving the green jumpers, I get the resistance I need. So, in this image, the resistance is 5,555,555R or 5.5Mega Ohms.